Before adding a client, we recommend completing the following steps:
 Connect your Stripe account Add your terms & conditions Create a service Set up relevant forms (e.g., check-in and onboarding forms)
Once you're ready, navigate to Clients and click Add. CoachKit will guide you through the process.
| Field Description |
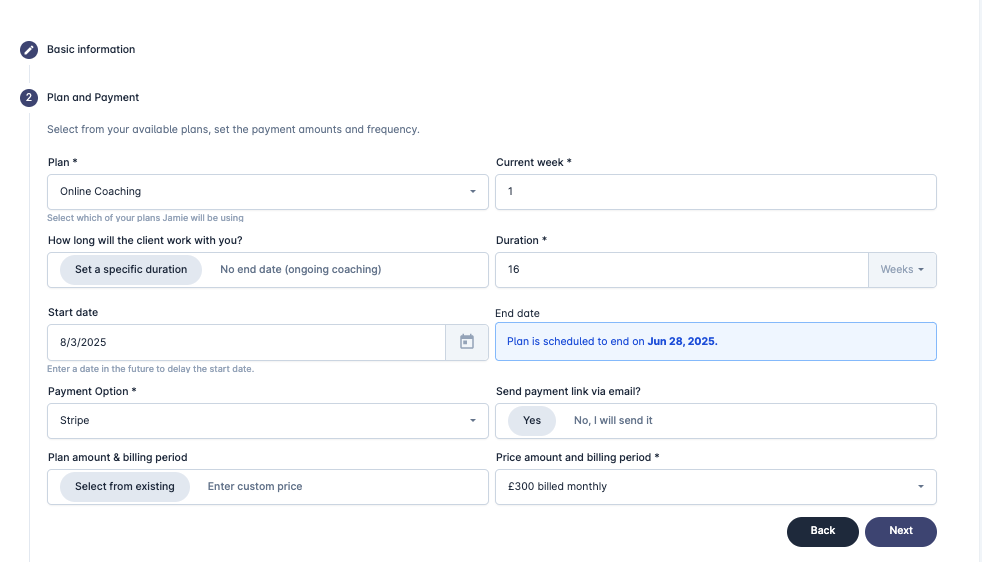
Plan | Select from your list of services. |
Current Week | Choose the starting week (defaults to Week 1). |
Duration | Set the plan duration in weeks (defaults to the plan's setting but can be overridden). Select No End Date for ongoing plans. |
Start Date | Choose the client’s start date (defaults to today but can be set for the future). |
Payment Option | Select Offline or Stripe (Stripe appears only if connected). |
Send Payment Link via Email? | If using Stripe, choose whether to send a payment request automatically. |
Plan Amount | Select from available pricing tiers or enter a custom price. |
| Field Description |
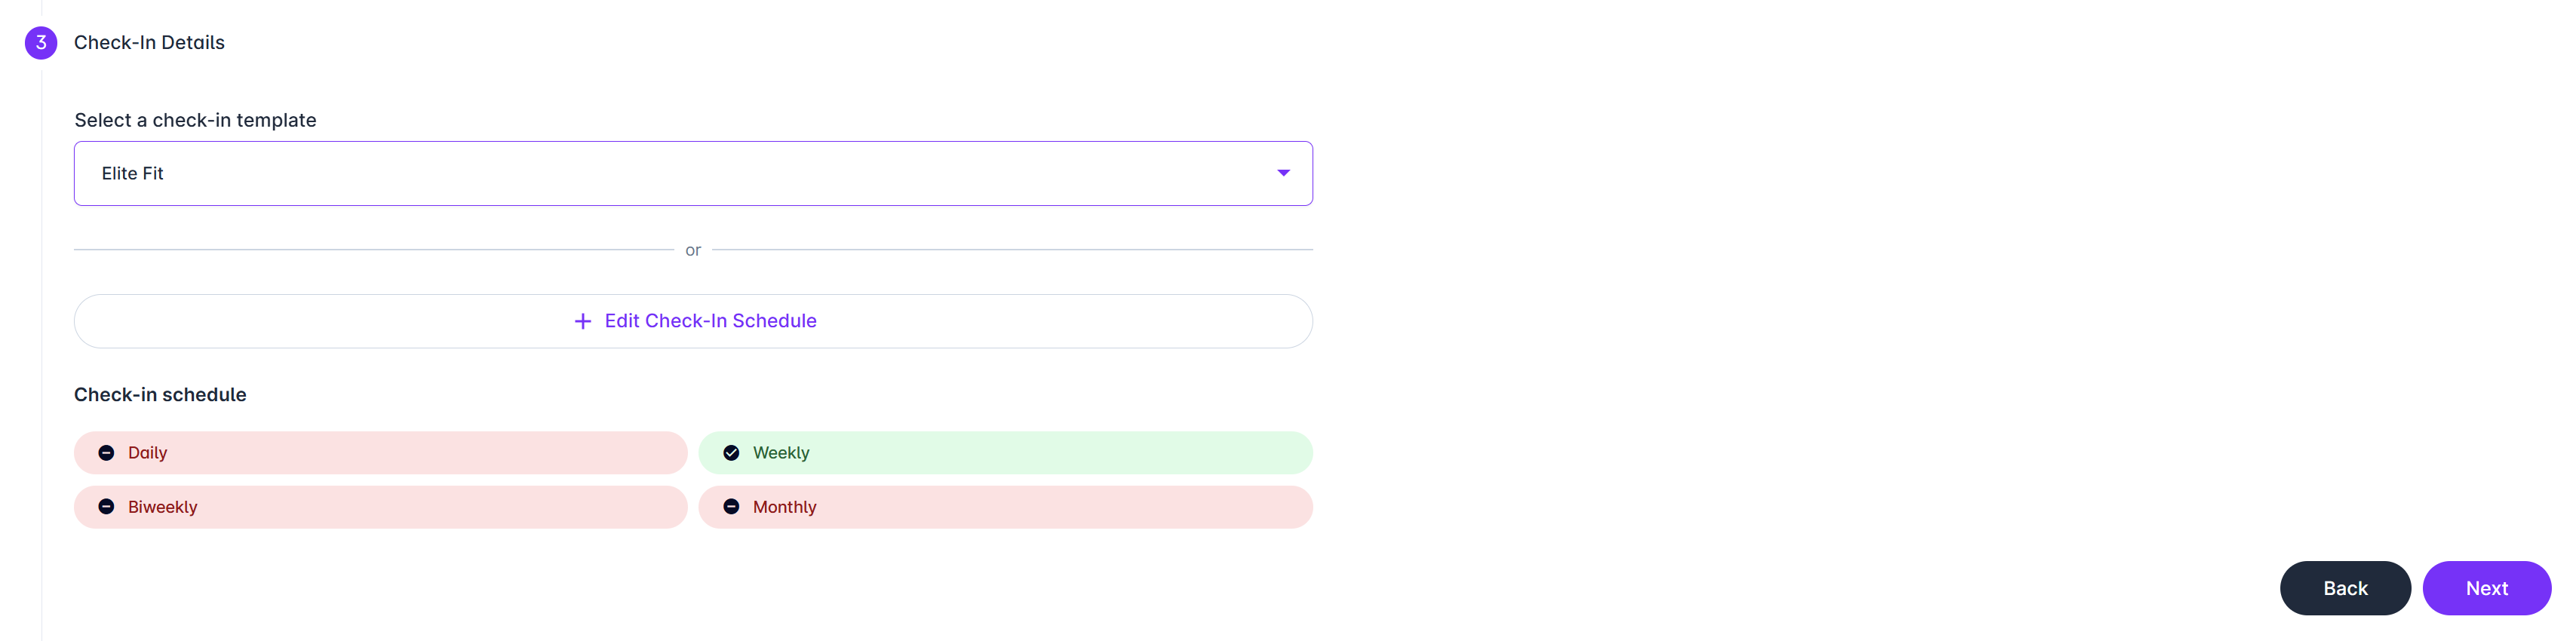
Select a check-in template | Choose an existing check-in template or create a new one |
Edit Check-in Schedule | Create a custom check-in schedule for your client |
If you prefer to skip setting up check-ins now, simply click Next to proceed to the following section.
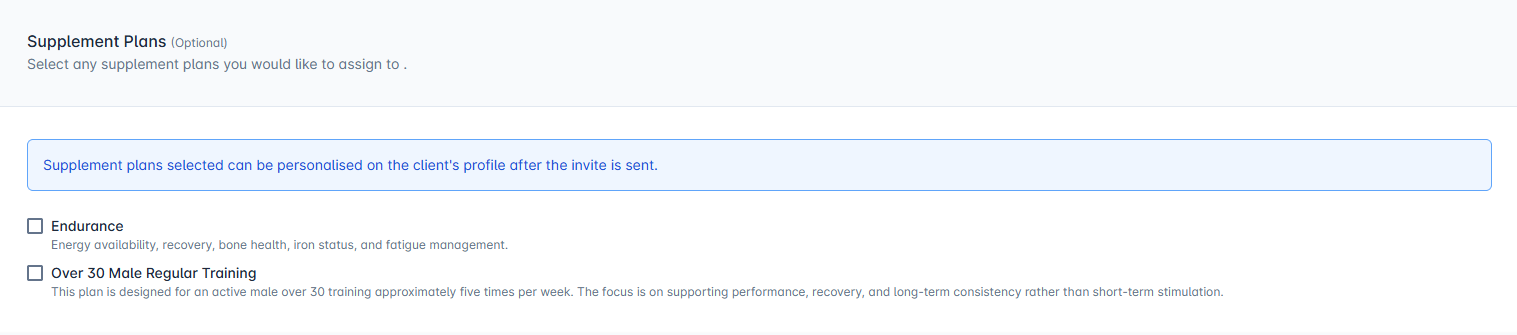
You can select multiple supplement plans at invite time, or if you prefer, add them later. Any assigned plans can be personalised for the client at a later date.
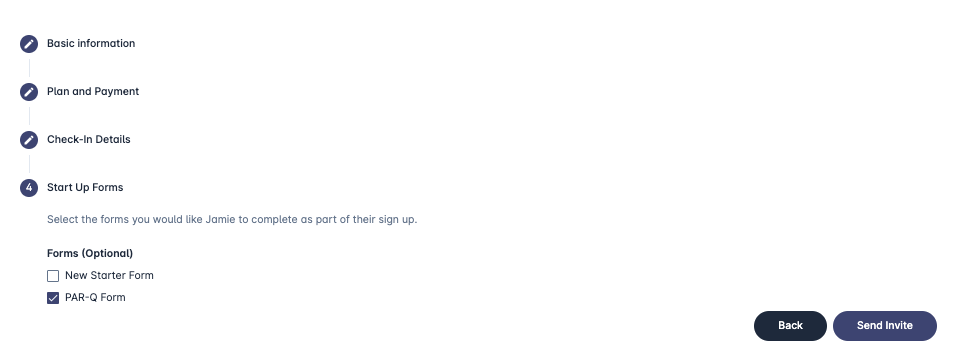
Select any additional forms the client should complete upon their first login.
When you click Send Invite, CoachKit will: Send a welcome email with a reset password link. Send a payment request (if Stripe is selected).
